Compulsory ventilation systems are present in almost every apartment or private house. They consist of an air intake device and an exhaust duct, which can be made of various materials.
A plastic hood for hoods is widespread - an affordable and durable element that can easily be installed independently.
In order for the assembled system to work efficiently, it is necessary to correctly calculate the cross-section of the channels, design and select the components of the duct. It is equally important to carry out competent installation.
We suggest dealing with all these issues in order. We added step-by-step instructions for arranging a plastic exhaust ventilation duct with visual photographs.
Duct selection options
For the normal functioning of the ventilation system using the hood, you must correctly calculate the parameters of the duct. In most cases, for household purposes, you can pick up plastic boxes of standard shapes and sizes.
Calculation of the optimal cross section of the ventilation duct
The main parameter of the ventilation duct is its internal section. The flow velocity along the channel depends on it and on the hood power. The section is selected based on the maximum volume of air passed through.
There are no normative documents regulating the speed for household plastic air ducts, therefore they are guided by the values verified in a practical way, equal to 3-7 meters per second.
The value of the cross-section of the duct is taken equal to or slightly larger than that of the exhaust duct pipe, the size of which is indicated in the device certificate.
If it is not planned to regularly turn on the maximum mode, then in this case a proportional reduction in the cross section of the ventilation duct relative to the size of the outlet is permissible.

For small kitchens, you can not apply the maximum power of the hood. This makes it possible to use a smaller duct diameter with an adapter than specified in the instructions
So if S - the cross-sectional area of the exhaust duct pipe, N - the volume of air passed at the maximum mode of the device, M - the volume of air allowed in the planned mode, the required cross-sectional area of the duct is calculated by the formula:
P = S * (M / N)
The insufficient value of the cross section of the duct leads to significant air velocities and an increase in the friction force.
This is fraught with the following negative effects:
- there is an increase in the load on the ventilation mechanisms of the hood, which leads to a decrease in the operational life of the device and additional energy costs;
- due to the increase in resistance, a decrease in maximum productivity occurs, which reduces the air circulation in the room;
- as a result of aerodynamic effects in the ventilation duct, the noise level during operation increases;
- there is an increase in air pressure from the inside to the elements of the system, as well as the occurrence of vibrations, which requires more reliable fastening and sealing.
If the cross-section of the duct is more than necessary, then this will not adversely affect the functioning of the forced ventilation system, but it will lead to excessive financial costs.
In addition, ventilation ducts and other large-sized units are more difficult to mount and integrate into the design of the premises.

The calculation table of the dependence of the flow rate on the exhaust power and the diameter of the round duct allows you to choose the right size of the ventilation duct
Shape and size
Plastic ducts for ventilation are round or rectangular. The circle has the smallest perimeter in comparison with other geometric figures with the same area.
Image Gallery
Photo from
For the installation of horizontal ducts and vertical channels produce plastic elements with a round, rectangular and square section
Parts for assembling ducts with a square and rectangular cross section are simpler and more understandable in assembling the system
Ducts assembled from rectangular and square parts look better in residential interiors, take up less space
The system of round pipes looks massive, despite the almost equal throughput, it requires the use of various tricks if you want to mask
When releasing elements for ventilation assembly, they adhere to the principle of compatibility of elements with different cross-sections, due to which it is possible to assemble boxes of combined shape
When installing combined ducts in shape, the main part, located closer to the hood, is better to make round, because it has less resistance to airflow
In the connection of plastic parts, clamps and ties treated with silicone are used; screws can be used at certain points that do not break the tightness
Plastic without problems "adjoins" with metal, wood, ceramic and other materials, which is why it is often used in the construction of systems masked by furniture and building structures
Plastic duct in the kitchen
Square duct
Rectangular type of plastic ventilation duct
Round pipe exhaust system
Combination of elements with different sections
Combined channel of round and rectangular sections
Fixing the plastic components of the box
Channel compatibility with trim and materials
Therefore, from the position of minimizing the resistance of the inner surface of the duct to the movement of the air flow generated by the hood, a round channel shape is preferred.
On sale for household purposes, the most common round plastic boxes of the following diameters:
- 80 mm, cross-sectional area of 50.3 square meters. cm;
- 100 mm, cross-sectional area 78.5 square meters. cm;
- 125 mm, sectional area 122.7 sq. cm;
- 150 mm, cross-sectional area of 176.7 square meters. cm.
Rectangular ventilation ducts are easier to fit into the interior of the room. They can be placed in niches above kitchen cabinets, above a suspended or suspended ceiling.
The most common boxes are the following sizes:
- 110 x 55 mm, sectional area 60.5 square meters. cm;
- 120 x 60 mm, sectional area 72 square meters. cm;
- 204 x 60 mm, sectional area 122.4 square meters. cm.
If necessary, you can find elements of a larger ventilation system. These are plastic boxes for household purposes, round in shape with a diameter of 200 mm, rectangular - from 220x90 mm.
However, before making a choice in favor of custom sizes, you need to make sure that you can purchase all the elements necessary to equip the duct for drawing the desired geometry.

The wide range of colors of plastic pipes and ducts for ventilation of residential buildings makes it easy to fit the duct into the interior of the room
Plastic fittings
Ventilation systems from the hood to the shaft have different geometry and topology due to individual approaches to the layout of kitchens. Therefore, special elements are provided for the implementation of almost any configuration of a plastic box.
Ventilation ducts are straight rectangular or circular duct elements. Their standard length is 0.35; 0.5; 1; 1.5 and 2 meters, however, you can independently cut a piece of the required size using a hacksaw or grinder.
If you need to get a straight section with a length of more than two meters, then it is mounted using several fragments of standard length using special connectors for plastic channels.
In this case, an increase in the length of the section due to the size of the connector does not occur.
Another necessary element is the knee, with the help of which the duct is rotated through an angle of 90 or 45 degrees. For rectangular boxes, elements are distinguished for changing the horizontal and vertical directions.
To turn at angles not multiple of 45 degrees, use the so-called multi-angle knee. Depending on the required angle, one of the sides of the connector is cut off.

Shaped elements: 1 - a rectangular channel; 2 - round channel; 3 - connector round channels; 4 - vertical knee; 5 - horizontal knee; 6 - knee different angle
To change the shape of the box from round to rectangular (or vice versa) use special adapters.
Their use, as a rule, is due to the difference in the shape of the ventilation channels with the outlet funnel of the hood or a hole in the surface grill. They can be either direct or angular.
The following transition options are most common on sale:
- from a diameter of 100 mm to a size of 110x55 mm;
- from a diameter of 100 mm to a size of 120x60 mm;
- from a diameter of 125 mm to a size of 204x60 mm.
If it is necessary to make the transition to another size of the plastic box without changing its shape, then gearboxes are used. For round options, there is a special universal adapter that can be used to connect all standard sizes.
For structures with complex topology tees are provided, with which air flows from several extractors can be connected, for example from the kitchen and from the bathroom, towards the exit.
They can be rectangular, round, as well as combined shapes.

Shaped elements: 1 - connector of flat channels; 2 - round knee; 3 - straight adapter; 4 - corner adapter; 5 - round gear; 6 - rectangular gear
Fastening the elements of the box to the wall occurs with the use of holders. Since plastic structures differ from metal ones in low weight, their installation is not a difficult task.
These factory-made parts are inexpensive and fit well into the interior of the room, so the use of home-made structures is impractical.
A wall plate or grille is mounted over the hole in the wall leading to the ventilation shaft or to the street. The grill, if necessary, may contain additional slots for natural ventilation.
In this case, it is necessary to provide protection against penetration through these openings of the exhaust air flow generated by the hood back into the room.
To prevent the occurrence of back draft when the hood is not working, a non-return valve is used. It can be integrated into the plastic channel connector, or the blinds of the ventilation grill can perform its function.
In the absence of such a device, air may come into the room from the street or from the ventilation shaft.

Shaped elements: 1 - universal round gear; 2 - round tee; 3 - rectangular tee; 4 - the holder is round; 5 - rectangular holder; 6 - overlay for round channels
Design and Installation Features
The installation of a plastic box for ventilation from the cooker hood can be done independently without the involvement of specialists. In this case, it is necessary to take into account some simple features of the design and installation of such systems.
The installation of the plastic system includes a number of traditional stages that are to be passed both by an independent master who decided to build a box with his own hands, and by hired workers.
Image Gallery
Photo from
Stage 1: To facilitate efforts and ensure safe conditions during assembly, we assemble parts of the plastic box on the floor
Stage 2: At the input of the ventilation duct into the common house shaft, we install an element with a check valve
Stage 3: We check whether the outlet with a check valve is installed correctly, which should open only in the direction of the shaft. If necessary, correct the situation
Stage 4: We collect the air duct on the floor, measure all sections and check with the distances at the installation site. If inaccuracies are identified, we eliminate them.
Stage 5: Again we disassemble the structure and move it up to the details. On-site assembly starts from the knee connected to the hood
Step 6: Consistently assemble the system, treating the joints with a sealant that is compatible in composition with the material of the constructed duct
Step 7: We connect the hood to the power supply and check the build quality by applying a piece of paper to the joints
Step 8: If during operation of the exhaust system there are no leaks in the area of connections, we proceed to operation
Assembling duct parts on the floor
Entrance to the ventilation shaft with check valve
Validating input setup
Assembling a plastic channel on the floor
Connecting the box to the knee from the hood
Series connection of elements
Ventilation Testing
Ready-to-use plastic box
Stage # 1 - choosing the geometry of the ventilation system
A wide variety of structural elements allows you to implement almost any geometry of a plastic ventilation duct.
To maintain the functionality of the air passage system at the proper level, the following rules must be observed when designing the duct:
- Box length. If possible, minimize the length of the box. The optimal distance from the exhaust pipe to the ventilation grill is considered a distance of less than 3 meters.
- Fewer items. It is advisable not to use a large number of elements that change the direction of air movement. Bends, constrictions and various transitions create additional aerodynamic drag.
- Minimum Turns. It is necessary to minimize the number of elbows with a 90 degree turn of the box. They create the greatest resistance to the movement of the flow, generate noise and accumulate deposits in the form of fat and dust adhering to it.
In the case of placing the box near the heating pipe or other heat source, it is necessary to prevent the plastic from heating to a temperature above 50 degrees Celsius.
To do this, you need to either go around a hot object or lay insulation between it and the duct.
As the insulating material, it is easiest to use foam, since it has low thermal conductivity. In addition, it will not create noise during vibration of the box.

Implementation of the bypass of the riser using four bends with an angle of 90 degrees. With a different orientation of the channel, if the narrow part were facing the wall, it would be possible to do with angles of 15-20 degrees using a different-angle knee
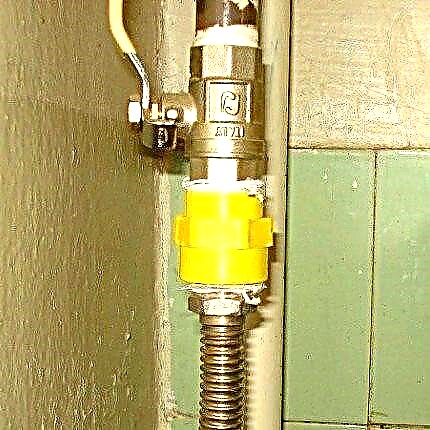
Stage # 2 - mounting the check valve and grille
A necessary element of the ventilation system is a check valve, the role of which is difficult to overestimate.
If the duct goes only from the hood to the shaft and does not have branches to other sources of air intake, then the valve is installed at the end of the duct. An alternative is to use a grille with a non-return valve to prevent air return.
If there are several sources of air intake into the ventilation system, a non-return valve is installed near the connection of each branch with the main duct and another one near the grille.

A typical solution for placing check valves in a ventilation system with two air intake points and an external grille
If you need to support natural ventilation when the hood is off, there are three solutions:
- Separate exits for forced and natural ventilation, and they should not go into one ventilation shaft;
- install a tee “exhaust hood - grate - check valve” near the outlet;
- use a ventilation grill with slots for natural air movement and protection against back draft.
Birds or rodents living in the ventilation shaft sometimes penetrate into the duct. Caught in the bends of a plastic box, they can die, as a result of which decomposition products enter the room.
To prevent such a development of events, the lattice leading to the street or to the mine is often provided with special protection, insuperable for animals.
Detailed information on the types and selection of ventilation grilles is described in this article.

Protection of the ventilation grill against the penetration of birds and rodents significantly narrows the cross-section, which must be taken into account when calculating the diameter of the hole
Stage # 3 - fasteners and duct installation
The sections of the plastic duct from the hood to the ventilation grill can be fixed in different ways, depending on their position relative to the cabinets, walls and ceiling.
In any case, the installation is not difficult and can be carried out independently.
However, it is necessary to approach this procedure responsibly, in order to avoid the occurrence of noise from vibrations, as well as sagging or other deformation of the box with its possible subsequent depressurization.
If the box is located inside the cabinets, then its fastening is carried out to the rear wall of the cabinet using clamps. Also fix the passage of the duct through the walls with foam or polystyrene inserts.
These materials do not make noise when in contact with vibrating elements of the system.
If a part of the duct is located above the cabinets, it is easiest to fix it to the cabinets with the help of holders and self-tapping screws on wood of short length. A plastic box in this position does not create any significant lateral pressure.
When attaching the duct to a wall or ceiling, it is recommended to place the holders after 1 meter. Fixing takes place with the help of special clamps, which can be purchased according to the shape and size of the purchased box.
The weight of the entire plastic structure is small, so its fastening is quite simple.

The plastic box can be completely hidden behind a suspended ceiling and drywall. In this case, it is permissible to seal and fasten the entire structure without taking into account its visual perception
If the plastic box is closed with a suspended or suspended ceiling, it is necessary to check the reliability of its fixation when the hood is operating at maximum power. In other cases, the mount can be easily strengthened after detecting weaknesses.
Sometimes during operation of the ventilation system, rattling or knocking may occur, caused by the contact of the vibrating elements of the plastic box with solid objects such as a cabinet, wall, etc.
In this case, instead of additional fastening, it is enough to lay foam rubber or polystyrene between them.
Image Gallery
Photo from
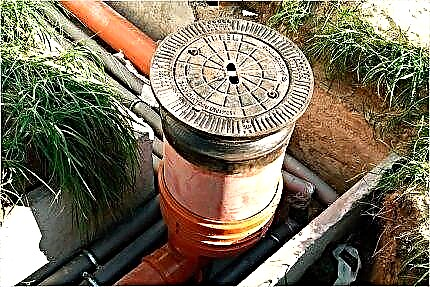
Duct from sewer pipes
Suspension of polymer duct
Conclusion of homemade ventilation to the street
The use of sealant in the joints
Stage # 4 - ensuring the tightness of the structure
Elements in a ventilation system made of plastic parts do not have a seal. The dimensions of the joints are well adjusted, but after some time, due to deformation, the density of some compounds may decrease.
In the event of a leak in the joints of the structural elements, air may penetrate from the ventilation system to the outside. In this case, odors and moist air spread through the rooms through which the duct passes.
In addition, when air passes through the slots, significant noise sometimes occurs.

Despite the fact that all the elements of a high-quality plastic box fit tightly to each other, it is better to take some time to seal the joints
To prevent depressurization of the plastic ventilation duct, there are two solutions:
- Sealant. Coat joints with a special silicone or acrylic sealant. It is applied in a thin layer to the edge of the element before it is inserted into the system.
- Scotch. Coat joints with adhesive tape. This method can be applied after installation of the system in case of detection of depressurization places.
The first method is more reliable, but serious problems may arise if it is necessary to disassemble the ventilation duct for repair, cleaning or changing its geometry.
Over time, the sealant fastens the structural elements so strongly that in some cases one of the parts has to be sacrificed to begin the system analysis.
The method of external sealing, on the contrary, makes it easy to parse a plastic box. However, this method affects the appearance of the structure, so it is practically not used if it is located in plain sight.
Installation of the kitchen box, the elimination of cracks in the joints of structural elements using silicone sealant and screws. Vibration prevention with foam in the following clip:
Install a plastic duct for the hood in the kitchen. Fastening elements to each other, fixing to the ceiling using holders:
The operation of the non-return valve for the functioning of natural ventilation on the example of the tee “hood - grille - natural ventilation":
The information we presented about the selection, methods of the device and the main components of the plastic ventilation ducts will help to build a reliable duct for kitchen ventilation with your own hands. The main thing is not to rush and carefully seal each joint of the ventilation duct.
All those interested in the issue of calculation, arrangement of air ducts and the installation of plastic exhaust ducts are invited to leave comments and ask questions. The contact form is located in the lower block.