In a typical apartment it’s hard to find a place for additional amenities. In a small bathroom only a toilet is placed. But small dimensions are not a reason to refuse to improve their housing.
Can't install a bidet? It is fully replaced by a hygienic shower for the toilet, which takes up a minimum of space and performs the same functions as the familiar hygiene device. His device, design features and existing varieties will be discussed in our article.
We will also analyze the intricacies of installing various types of hygienic showers, consider the main advantages and list the best manufacturers on the plumbing market.
Hygienic Shower Design
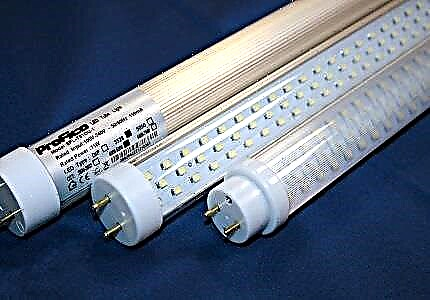
Visually, a shower for performing procedures relating to personal hygiene is almost no different from an ordinary shower.
Both the one and the other device comprise the following parts:
- mixer;
- flexible hose;
- watering can.
There are still differences, and they are due to the purpose of the device. Since the head of a hygienic shower should not give a diffused, but a jet focused in one direction and preferably without spray, it is much smaller than that of an ordinary shower.
Faucets for some representatives of this special category of showers are equipped with a thermostat, which is very convenient since no need to select the temperature - it is automatically adjusted.
The thermostat is designed to mix water ‚passed through a mixer‚ to such a temperature that a person feels comfortable. A one-time adjustment is enough after installing a hygienic shower in the toilet and the thermostat will constantly maintain the set temperature.
The presence of this element will protect against burns, and if hot water disappears in the system, then the unpleasant sensations from this will be minimized.

The toilet, with a hygienic shower connected to it, will gain new functionality, and a modest-sized bathroom becomes much more convenient. Such a shower can be used not only for its intended purpose, but also to wash with it shoes, a baby's potty, a toilet for a cat
While an ordinary shower has 2 exits - for a flexible hose and a nozzle, then a hygienic shower for the toilet simply does not need a second one.
Another feature - even if the mixer is turned on, water does not flow out of it, until a special button is pressed, with the help of which the flow is controlled. The pressure of the jet is regulated by the lever of the mixer.
The main types of devices
It is important to know the advantages of this option to solve the problem of keeping your body clean, such as installing a hanging or floor toilet with a hygienic shower.
Usually 5 main arguments are given:
- simple installation ‚carried out in several ways;
- space saving in a small room;
- universality;
- affordable price;
- the convenience of use.
The concept of a hygienic shower includes completely different sanitary equipment in appearance. By design, there are 4 types of these devices for personal hygiene.
Option # 1 - toilet bidet
This equipment is of a special design ‚in the body of which nozzles are mounted. The control unit is integrated in the drain tank, which slightly increases its dimensions.
Plumbing fixtures of this type are both floor and hanging. Manufacturers ‚in the process of improving their products‚ constantly add new ones to the list of available functions.
We recommend that you familiarize yourself with the models of toilet bidet attachments on the market. This information is considered in detail in our other article.

The most popular hanging toilet ‚supplemented by a bidet function. It is more convenient and better in terms of aesthetics since his tank is masked by a drywall
Option # 2 - Bidet Cover
A rather convenient mobile addition to the old toilet can be a bidet cover. The control unit ‚built into the cover‚ may include the function of heating the water to a comfortable temperature ‚drying‚ soft lowering of the seat.

Although in appearance this special cover resembles a traditional seat, structurally it is very different from it. The installation of this element completely transforms the toilet, it acquires all the characteristics of a bidet
An interesting solution is the electronic toilet bidet covers. This is an elite plumbing manufactured by well-known brands. Such devices are more functional and comfortable to use, but they also have a higher price tag than conventional ones.
Option # 3 - wall-mounted construction
The hygienic shower option mounted on the wall is quite convenient to use. Near the toilet place a long flexible hose with a compact watering can. Mount it to the water pipes, and this is additional construction work.

A good alternative to a shower built into the toilet is such an addition as a shower located nearby on the wall
Option # 4 - connected under the sink shower
To realize this option, you need to place a sink next to the toilet. A watering can and a flexible hose are mounted on a special design mixer with three outlets. A miniature corner sink is enough for a separate bathroom.

When you turn the mixer knob, the spray from the nozzle enters the sink. For water to flow out of the shower ‚you need to press the button on the watering can
The last option of a hygienic shower is the most profitable, based on the cost of the device itself and its installation. Its advantage is that you can not be afraid that the water will be too hot - its temperature can be adjusted to a comfortable level above the sink.
If you do not close the faucet due to distraction, the water will drain into the sink, which will prevent flooding of the neighbors.
Types of Hygienic Shower Faucets
According to the constructional solution, this element of the hygienic shower can be of three types - valve, lever and with thermostat.
The first is more common and differs in that the control of the volume of water is carried out by means of a valve tap. It is mounted when connecting a hygienic shower to a sanitary cabinet. Thus, adjusting the water temperature manually is inconvenient ‚additional connection of the thermostat will be required.
The lever mixer is more convenient in operation. It works well without additional equipment, so its installation is easier. The designers assigned the lever the role of a regulator of water pressure and its temperature. Managing all this with its help is simple.

In the photo - a single lever chrome mixer. During installation, do not connect a long hose to it. It will become a hindrance to temperature control
To constantly maintain optimal temperature and pressure of a water stream for a particular person or all living in an apartment, a mixer thermostat is more suitable than others. Its work is not affected by any pressure surges in the system. The disadvantage is the high cost of the device.
How to install correctly?
The installation of a toilet bidet is carried out almost according to the same technology as for a simple toilet. The difference is that you have to additionally connect water and install a mixer.
This process for other types of sanitary equipment of this type has significant differences and requires knowledge of many nuances.

The installation process of the hygienic rain is divided into 2 stages - at the first it is connected to the water supply system and at the second - the equipment itself is installed
One of them concerns the height of the hygienic shower. It is optimal when the level of the holder and the mixer coincides with the upper line of the tank, and in order to reach the holder it is enough just to extend a hand.
Installing a hygienic shower on a wall
If the dimensions of the apartment do not allow you to install a sink near the toilet, you can install an external or built-in model of a hygienic shower on the wall in the toilet.
Having chosen this option ‚you need to constantly ensure that the mixer does not remain open. Otherwise, pressure remains in the hose and in the watering can, destructively acting on them.

According to this scheme, a hygienic shower is installed. It is fixed to the wall with the holder included in the kit.
With an external water supply, a tee must be installed to insert the mixer. To do this, shut off the water supply, both cold and hot, and drain the remaining liquid.
Then proceed to insert the mixer. To do this ‚you need to put tees and taps on the pipelines‚ supplying hot and cold water. First of all, they shut off water and relieve pressure, then there will be no puddles on the floor.
The next step is to disconnect the flexible discharge of the toilet flush tank. Here you need to substitute the tank to drain the remaining water.
Disassemble the connection at the lowest point of hot water supply, substituting a container under this place, so that the glass water. If hot water is not supplied centrally, but individually from a water heater installed in the apartment, then it is often supplied with a plastic pipe connected to an old steel pipe. Therefore, having disconnected the pipe from plastic, unscrew the coupling.
They clean the steel pipe ‚remove the winding. A sealant layer in the form of a linen tow is wound on the tee and pipe threads, then the tee is screwed on and the metal-plastic pipe is returned to its place. Before this, it is shortened a bit and burrs removed ‚so that they do not damage the rubber seal.
Next, a ball valve is mounted to shut off the mixer and finally reconnect.

Experienced practitioners recommend that you supply both hot and cold water exclusively using metal-plastic pipes.
To connect the toilet bowl, mount a tee on a pipe with cold water. As in the first case, a tow is wound on the thread, a sealant is applied, the assembly is put in place. Thus, an outlet is obtained both to the mixer ‚and to the drain tank.
Mount a tap for the toilet tank and connect a flexible hose. To install the first element you will need a corner. The thread on it is very slippery, so it is notched with an adjustable key.
A non-return valve is installed on the pipe supplying cold water so that hot water does not enter the cold water supply system, which is possible if someone forgets to close the mixer. Then proceed to the installation of the mixer. One of the options for fixing it is fixing it on a special factory-made holder.
You can make a holder yourself by cutting a rectangle from plywood and attaching it to a wooden block. In its center make a hole ‚paint. Having inserted the mixer into the prepared hole, connect it to the water supply. A hose with a watering can is connected to the mixer through an adapter.
At the end of the process, a hanging or floor toilet with a hygienic shower is tested for leaks.
The installation option for the built-in hygienic shower is chosen when the walls are not yet tiled or when the bathroom is overhauled, when the old finish is replaced with a new one. A niche is made in the wall, and 3 grooves are laid to it. Water is supplied to the mixer in two, the third serves to remove it and supply it to the shower hose.
A niche is needed to place the mixer, and strobes for the ability to hide the pipes. After connecting the pipes, they perform the wall lining, then mount the lever and sleeve with a watering can.
Smart Kit Installation Guide
Let us analyze the installation process of a kit consisting of a hygienic shower and a bidet of a lining on a good example.

The complete set of the system for personal hygiene has literally everything that is required for installation. However, you will have to buy a flexible eyeliner, laid from the tee to the tapping into the water supply and the tee F1 / 2 ″ × M1 / 2 ″ × 12 with a union nut
We will install on a regular toilet.
Image Gallery
Photo from
We are preparing the toilet for the installation of a hygiene system, including a shower, and a simplified version of the bidet. We remove the cover from the equipment, wash and dry the device
To ensure that during the work the absence of any part does not come as a surprise, we thoroughly study the equipment and read the installation manual
You can arrange both components of the complex on the right or left. You need to immediately decide which side will be the most popular device. Please note that there should be anti-skid bands on the back of the mounting plate, they should be in contact with the toilet
We decided that the hygienic shower would be on the left, and the device for controlling the bidet attachment on the right. Set the bar from the shower to the toilet
We get acquainted with the complete set and installation manual attached to the bidet pad of the complex
We put the base of the bidet on top of the metal mounting plate, trying to ensure that the nozzle is installed directly in the center of the toilet
Having chosen the optimal place for both components of the hygiene complex, we move the moving parts of the lining fastening to align the mounting holes
Through the mounting holes of both parts of the kit we pass the mounting screws of the toilet seat. Aligning the complex and the cover, we fix the position of all devices by screwing nuts on the screws on the bottom of the toilet
Step 1: Preparing the toilet for installation of a hygiene complex
Step 2: Getting to Know Your Equipment
Step 3: Choosing the side for attaching the shower
Step 4: Installing the Hygiene Shower Bar
Step 5: Get to Know Your Bidet Kit
Step 6: Installing a Bidet Pad Over the Shower Head
Step 8: Aligning the mounting holes of the devices
Step 8: Replacing the Toilet Seat
The bases on which the hygiene devices are inoperative and the control system with the bidet cover are installed.
Now we proceed to the assembly of the mixer and its installation:
Image Gallery
Photo from
Step 9: Checking the faucet for the shower
Step 10: Install O-Ring
Step 11: Connect Flexible Hose to the Mixer
Step 12: Installing the Mixer in the Seat
Step 13: Mounting the Mixer with Mounting Plates
Step 14: Screw the adapter onto the mixer
Step 15: Assembling the Bidet Tee Tee
Step 16: Screwing the Hygiene Tee
Next, we will assemble and connect directly a hygienic shower, consisting of a bellows hose and a shower head, as well as installing a bidet pad control device:
Image Gallery
Photo from
Having placed one of the outputs of the bellows hose to the mixer on the sink, open the tap and check for leaks
After checking for leaks, we fasten the bellows hose to the shower head, do not forget to put the gasket in the connection
We put the collected watering can of the hygienic shower into the hole intended for it in the metal bar
We fasten the bellows hose with a watering can to the end pipe of the tee connected from below to the mixer
We connect a tube from the bidet of the cover plate to the lateral branch pipe of the tee, through which water mixed in the mixer will be supplied to the device
We fix the tube with a nut, not forgetting to wrap the thread with plumbing thread before that.
On the other hand, we connect the tube to the device that regulates the supply of water to the bidet pad
We tighten the nut ensuring the tightness of the connection between the tube and the bidet control device, but do not apply excessive force so as not to damage the system parts
Step 17: Examine the Status of the Bellows Hose
Step 18: Connecting the Chuck to the Bellows Hose
Step 20: Installing the Sanitary Wand on a Strap
Step 19: Connect the Bellows Hose to the Tee
Step 21: Attaching the Bidet Pipe Tube
Step 22: Attach the nozzle tube with a nut
Step 23: Connect to the Bidet Water Supply Unit
Step 24: Tight connection to the device
At the end, we connect the hygiene complex to the water branch:
Image Gallery
Photo from
Step 25: Connect Tee to Flush Tank
Step 26: Connect Tee to Cold Water
Step 27: Connect the pipe to the side pipe
Step 28: Option to connect to the DHW line
Mounting the bidet cover
They release bidet covers without the function of heating water and with it. The kit with the device ‚preheating the water‚ is powered by electricity. As a rule, this includes a hairdryer.
Covers with electronic shutdown often have a button for manual control and automation. In addition, there may be an audible alarm on such a cover, reminiscent of the need to turn off the device. Many models are complemented by a disinfecting system. In this case, there is a special container for liquid, which flushes both the toilet itself and the nozzle.
As with the installation of a wall-mounted hygienic shower, before installing the lid-bidet, cut off the path of water to the tank and empty it. The flexible hose ‚which supplies water to the tank and the lid on the toilet‚ are removed. Remove the fixing plate from the cover and attach it to the toilet.
Remove the nuts and washers from the mounting bolts, thread them through the holes of the toilet bowl and tighten. A cover is inserted into the grooves until a click is heard. Install the tee on the hose, then mount the filter. Insert one nipple into the filter, and the second into the lid. Combine the filter and the cover by means of a tube and check how water flows.
Image Gallery
Photo from
Mechanically Operated Bidet Cover
Standardized Mount Type
The nozzle is centered
Connecting bidet covers to water lines
How to install a shower on the sink?
If in the toilet you can find a place to install a sink, then to install a hygienic shower design you need to purchase a special mixer, which includes the following elements:
- lever arm;
- nose;
- spout with a thread to which the hose is connected.
The principle of operation is that when the faucet is open, water goes through the spout into the sink, and when the button on the handle is activated, it switches and the toilet starts working as a bidet.
Manufacturers of the best hygiene showers
This type of plumbing is widely marketed. Choosing preferences should have companies with a well-known name. There are not very many manufacturers of quality products.
The following brands are ahead:
- Hansgrohe;
- Damixa;
- Grohe;
- Geberit
Mixers ‚manufactured at the enterprises of these companies‚ are of excellent quality ‚convenient to use, but their price is corresponding. Saving is still inappropriate in this case. The device ‚purchased for little money‚ will not last long ‚and a high-quality‚ but expensive product will justify the funds invested in it for dozens of years of trouble-free operation.
We recommend that you familiarize yourself with the rating of the best models of hygienic shower, compiled on the basis of feedback from real users.
In order not to purchase a fake, you need to check the availability of a quality certificate. The original hygienic shower can be made of brass ‚stainless steel or other‚ no less high-quality ‚chrome-plated material. A metal braid should be present on the hose ‚and on the plastic watering can a coating of a special composition.
One of the methods for installing a hygienic shower is highlighted here:
We learn to install a hygienic shower on the sink:
Hygienic shower on the toilet can be installed even in the smallest toilet. It makes the bathroom more functional and convenient, but you should not use it instead of a traditional shower.
The choice of designs is very large and among them there will certainly be a suitable model. Such equipment is chosen based on the layout ‚the size of the toilet‚ as well as its design features.
Are you using a hygienic shower that you installed yourself? Are you having difficulty installing? Are you satisfied with this model and its manufacturer - share your impressions of use, add photos.
Or maybe you have something to add or recommend to people who are just eyeing a hygienic shower? Express your opinion in the comments section.