For several years, toilet bowls remain oblique. Their popularity is simply explained: it is such a connection to the sewage system that is most convenient, because Elements do not need to be customized during installation.
These models are perfect for apartments in high-rise buildings, as well as for private houses. And with the installation, if desired, you can cope on your own. In our article, we will consider how to install a toilet with an oblique outlet without outside help. We give a phased briefing, describing each step in detail. All actions are accompanied by visual photos and expert recommendations.
Features of models with oblique release
The oblique outlet of the toilet is inclined relative to the floor. This allows you to easily connect plumbing fixtures to the sewer system even in cases where there is no fixed connection point, which is not possible when installing models with horizontal or toilets with vertical discharge.
Mostly multi-storey and private houses were built according to standard designs. The communication schemes are very similar, and the layout of the elements of the sewer systems is thought out so that when installing toilets with an oblique outlet, there are least likely to be problems. Installation is simple, takes a minimum of time, and anyone who knows how to handle tools can perform it.

The toilet outlet can be located at the same level with the riser, be directed to the floor or at an angle to it. The last option is the most common
Models with an oblique release are very convenient in operation. When installing them, not one knee is installed at an angle of 90 °, but two, each of which has a rotation angle of 45 °.
Thanks to this design, sewage from the toilet easily gets into the sewer system and does not accumulate. If the device is installed correctly, blockages are extremely rare, it is easier to deal with them.
Image Gallery
Photo from
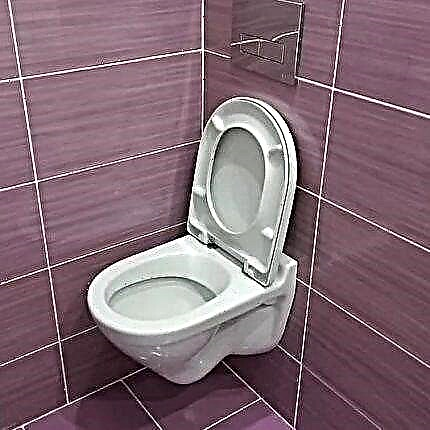
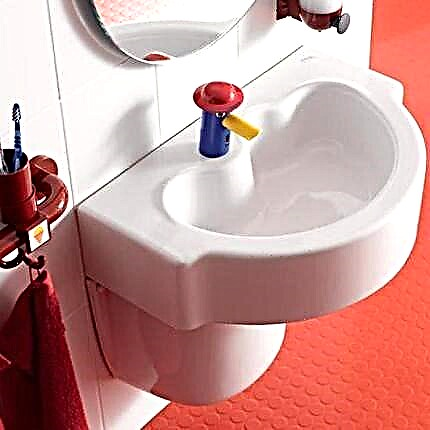
Oblique Toilet Model
Slope provides fast, trouble-free flow
Discharge to the sewer system
Technology leak
Detailed installation instructions
Usually, before installing the toilet, you have to remove the old plumbing, unless the work is carried out in a new building. For dismantling, you may need a set of screwdrivers, a small crowbar, a metal saw, a hammer or a sledgehammer.
And for installing a new plumbing fixture, such tools and materials are useful:
- hammer drill or drill with drill bits;
- measuring instruments;
- marker or pencil for marking;
- key sets - adjustable and wrenches;
- a piece of sandpaper;
- special sealing compound for plumbing and a soft silicone spatula for leveling seams;
- cement;
- tar strand, tow, flax or other sealant;
- rags, a rag or absorbent wipes for wiping water and drying surfaces.
To connect the toilet drain to the sewer, various elements are used - pipes, corrugation or cuffs with eccentrics. It is necessary to determine in advance the method of attachment and purchase the necessary parts.

Water is supplied to the drain tank using a flexible hose, and to adjust its flow, you will need to install a ball valve. These parts are also purchased before installation.
As for fasteners (bolts, plugs and gaskets for them, screws, dowels, etc.), usually manufacturers themselves complete their products with them. However, it happens that the toilet is sold "as is" - without the necessary elements. Then you have to buy them separately.
It is advisable to do this immediately and in the same store where you purchase plumbing. Make sure all parts are suitable in size and diameter.
Image Gallery
Photo from
Node for connection to the sewer system
Corrugated pipe in plumbing connection
Using a cuff
Seal in connection to the pig-iron pipeline
Stage 1 - dismantling old plumbing
Before dismantling, it is advisable to wash the old toilet bowl with an antiseptic. For this, chlorine-containing household chemicals, for example, "White" or "Toilet Duckling," are perfect.
When working, be sure to use gloves. This will help to avoid accidental scratches, abrasions with subsequent infection.

From the toilet should take out all the excess: mats, brushes, paper holders and other accessories. If the bathroom is combined, toothbrushes, cups, towels, hygiene products must be cleaned
For the period of work, it is worth abandoning the operation of the sewage system. If the toilet is changed in an apartment of a multi-storey building, it is advisable that the neighbors also do not flush anything in the toilet. First of all, shut off the water, drain from the tank, disconnect the underwater hose.
It is better to immediately remove the tank, otherwise it will be difficult to dismantle the entire structure with it. To do this, unscrew the nuts on which the lid and connections to the bowl are held. If the model of the tank is wall mounted, then it is not necessary to disassemble it; it is enough to detach it from the base of the toilet bowl.
Features of the dismantling of old plumbing depend on its mounting method. Toilets are installed on taffeta (thick oak board), mounted on adhesive mastic or standard fasteners.

The most difficult thing is to dismantle the models installed back in Soviet times. They were powerfully fastened, and the joints were sealed with cement. As a rule, this design cannot be removed without damaging the bends or pipes.
If you have to dismantle the model mounted on the taffeta, you need to unscrew the screws to free the base. It often happens that the toilet outlet is sealed with cement mortar. It must be carefully knocked out with a hammer, chisel or chisel. You can solve the problem dramatically: with a sharp blow under the bowl, make sure that the pipe breaks, and then dismantle the structure in parts.
The toilet bowl can be mounted on heavy rubber glued to the floor. In this case, a strong sharp blow of the palm on the base of the toilet bowl in front is enough to loosen it. Then it remains only to get the issue.

Often for the repair period put the so-called temporary toilet. It is not equipped with a tank, and for flushing use water collected in a bucket
The only correct way to fix the toilet is with screws. This design is easy to dismantle. It is enough to remove the decorative plugs masking the fasteners and unscrew the screws themselves.
The outlet must be carefully removed from the socket of the sewer pipe. The toilet is easily and without damage removed.
Image Gallery
Photo from
Old toilet on the floor tiles
Toilet lined in concrete floor
Corrugated Pipe Connection
Need for repair of a pig-iron pipeline
We have another article on the site with step-by-step instruction on dismantling the old toilet. We recommend that you familiarize yourself with it.
Stage 2 - foundation preparation
The surface on which the toilet is installed must be perfectly flat, because uneven structural loads can cause cracks. If there are differences, the base is leveled with cement mortar. Then you have to postpone the installation of a new toilet bowl until the solution is completely dry.

If the toilet clearly falls into place of the old and does not have to prepare the surface, this is a lot of luck. However, it happens infrequently and usually has to do extra work
When all the preparatory work is completed, you can proceed with the installation of new plumbing.
Stage 3 - connection to the sewerage
The toilet needs to be assembled and “tried on” to the place of future installation. It is put exactly in the way it will be located, the fastening points of the bolts are marked. If the device will be connected using a fan pipe, you should immediately determine the scale of the fit.
There are three main ways to connect to the sewer:
- directly into the socket of the sewer pipeline;
- using an eccentric cuff;
- using corrugated tap.
Installing a pipe into the socket is an ideal option that can be used if the new device clearly falls into place of the old one. As a rule, this happens either with extremely accurate calculations, or when replacing the toilet with the same new model.
To seal the connection of the elements, a special sealing sleeve is used. Moreover, when buying it, you should definitely consider the material of the sewer pipeline - plastic or cast iron. It depends on what type of cuff is suitable.
Connecting to the sewer takes a few minutes. A seal must be installed in the socket, and then the toilet outlet pipe must be pushed into it. If additional sealing is needed, the joints can be treated with a plumbing sealant.

Seal the connection of the elements of the sewer system with a resin strand, tow or linen. The choice depends on the personal preferences of the installer.
An oblique outlet can be connected to the sewer system using an eccentric cuff. The axis of the cylinders of such a cuff can be located with a displacement of up to 5 cm relative to each other (i.e., the toilet can be installed no more than 5 cm to the left or right of the center of the sewer socket).
Before connecting the eccentric cuff to the sewer pipe, it is necessary to thoroughly clean the socket from contaminants, degrease and dry so that moisture does not interfere with the joints.
After preparation, a waterproof silicone sealant is applied to the cuff, and it is connected to the toilet outlet. When the sealing compound is completely dry, the bell of the sewer pipe is also treated, the other end of the cuff is connected to it.
After connecting to the sewage system, it is advisable not to use the toilet bowl for at least a couple of hours before the final polymerization of the sealant (the exact time is indicated on the packaging of the composition).

The eccentric cuff is initially available with a seal, which ensures a tight fit of surfaces and reliable sealing of joints
There are cases when the eccentric cuff is useless, because the deviation between the toilet outlet and the socket of the sewer pipe is more than 5 cm. Then the only way to install plumbing without altering a whole section of the sewer system is to use a corrugated outlet.
The main advantage of the corrugation for the toilet is that it is used for any deviations, and the toilet can be set at any angle with respect to the funnel. If major changes are planned and it is necessary to turn the sanitary equipment at 90 °, this is also possible. Using a corrugation, it is easy to replace a toilet with a vertical type of release with a model with an oblique.
To establish a corrugated outlet, a strip of sealant is applied to the toilet outlet and a part of the corrugation where the membrane is located is pulled on it. The edge of the exhaust pipe should be closed by 5-6 cm, and the part should be worn evenly, without distortions. Before connecting the drain to the sewer, wait for the polymerization of the sealant.

In addition to the pluses, the corrugation has a big minus: because of it, the toilet becomes at a considerable distance from the wall
When the corrugation is firmly glued to the outlet, it is carefully inserted into the cleaned sewer socket with the part on which the external seal is located. For greater reliability, the joints can be treated with silicone sealant, but this is not necessary.
Also on our site there are other articles in which various schemes for connecting the toilet are thoroughly analyzed and installation instructions using various adapters are given. We advise you to familiarize yourself with them in order to choose the most suitable option for yourself:
- Installing the corrugation on the toilet and the specifics of connecting plumbing with it
- Rubber cuff for toilet bowl (eccentric): installation and connection rules
- How to connect a toilet to the sewer: an overview of installation technologies for all types of toilets
Stage 4 - fixing the device to the floor
The toilet is fixed to the floor in several ways:
- anchors or dowels;
- taffeta screws;
- on epoxy adhesive.
If the toilet is placed after pouring the screed, an anchor or taffeta can be used. If the mount is anchor, then the fasteners are installed so that part remains above the floor (up to 5-6 cm). If necessary, they can always be cut, but if there is not enough anchor to fix the nut, there will be much more difficulties.

To fix the toilet to the tile floor using dowels, rubber gaskets are installed to prevent cracks in the tile
For taffeta, they take a solid two-inch wooden board, preferably oak. Its dimensions should correspond to the toilet leg. On the entire surface of the board, nails are stuffed so that they pass through, and the tips stick out a little on the other side.
Taffeta is installed in a concrete screed, turning caps of nails up. The board is poured with a solution so that it covers it on the sides to the upper edge. When the concrete has dried, it will be possible to install a toilet bowl on the taffeta and fix it to it with screws.
Instead of a wooden board, you can install thick thick rubber. Such a gasket can be made from an old rubber mat.
On our site there is a detailed analysis of the ways of fastening the toilet and detailed instructions with visual illustrations of each stage of work. To get acquainted with them, please click on this link.

A wooden board will be exposed to moisture, so it is advisable to choose a good quality material and treat it with antiseptics
If ceramic tiles are laid on the floor, the toilet can be “planted” on epoxy. It perfectly glues a variety of materials and is durable. Mounting is simple, but takes a lot of time, because epoxy dries and hardens for at least 12-15 hours.
Before gluing the base of the toilet bowl it is necessary to prepare the surfaces - thoroughly clean, dust, degrease with a solvent, and dry. The tile is peeled with sandpaper to make it rougher.

Epoxy resin is either bought ready-made, or made with your own hands, mixing ED-6, cement, solvent, hardener. During the preparation of the adhesive, the components are heated
If you want to prepare the resin, it is important to monitor the temperature so that it does not rise above 50 C. If the epoxy resin is prepared correctly, it looks plastic, uniform and suitable for use within the next 1-1.5 hours.
Epoxy resin is applied to the toilet leg with a layer of 4 mm or more and the device is put in place, pressing it firmly to the floor. Within 12 hours, it must not be moved, used or continued to do any work, as this may affect the strength of the mount.
More detailed instructions for installing the toilet on the tile, we reviewed here.
Stage 5 - water connection
Water can flow into the drain tank from below or from the side. The lower eyeliner is considered more practical, but requires attention when connecting a hose. Side eyeliner is easier to connect, but during operation, such a tank may make noise. This is a solvable problem. If you use a longer hose, the noise during water intake will be minimal.

The flexible inlet hose is universal and is suitable for connecting virtually all types of tanks. It is less durable than hard, but more convenient to install.
You can connect the tank to the water supply with a flexible or rigid inlet hose.The second option is usually used if the structure is mounted on the wall, and access for technical inspections and repairs is difficult. In other cases, it is better to choose a flexible connection hose.
Work order:
- A separate faucet is mounted on the water pipe so that if necessary it was possible to turn off the water supply to the tank.
- A flexible hose is connected to the embedded tap and carefully tightened using a lock nut.
- The second end of the liner is also mounted on the drain tank.
- It remains only to make sure that the connection is tight. To do this, open the faucet and observe if the joint leaks when collecting water into the tank.
- If the compounds let water through, they are sealed with fum or treated with a plumbing sealant.
Sometimes the problem of water leakage occurs due to a defective hose.
If no sealing methods can help eliminate the leak, you will have to replace the eyeliner with a new one.
The models of toilets with an oblique outlet can vary greatly, but the installation procedure is always the same. We offer several video instructions that can be useful and answer questions that arise during the selection and installation of the device.
Recommendations for choosing the right toilet. What nuances should be considered so as not to be mistaken and buy a suitable model:
Detailed installation instructions with detailed explanations:
Tips on how to install the inlet hose for connecting the drain tank to the water supply yourself:
To install a toilet with an oblique outlet with your own hands, you do not have to be a qualified plumber. This is a simple task. The main thing is to responsibly approach the choice of model and accessories, to think out a suitable way to connect to the sewer and fasten to the floor and carefully perform all the work.
If you doubt your abilities, it is better to turn to specialists for help.
Do you install a toilet at home and do-it-yourself connect it to communications? Maybe you have any questions? Ask them to our expert in the comment block.
Or have you completed the installation of the toilet? What stage of work was the most difficult for you? Share your tips, add photos of the finished work - many beginners who doubt their abilities will be grateful to you.