Deepening the external sewage system deeper than the freezing ground is troublesome work, especially if the work is done in winter. An alternative frost protection option is a heating cable for sewer pipes. You should familiarize yourself with the features of its styling, agree?
From the article we have proposed, you will learn all about the cable heating device for a sewer pipeline. We will tell you how the heating cable works and how to correctly choose the best option. For independent owners, a step-by-step guide to laying and fixing is provided.
Why is the sewage freezing?
The problem of freezing the sewer pipe is not detected immediately. Unlike water utilities, the fluid flow here is not constant and does not completely fill the pipe section.
In addition, sewage entering the sewage system usually has a higher temperature than, for example, water from a well. Therefore, the freezing of effluents occurs gradually.
At first, only some small part of the contents of the sewage system can freeze, then another layer of frozen sewage appears, etc. Gradually, the entire lumen of the pipe is filled with a dense frozen mass, after which the problem becomes apparent. The problem can be aggravated by faulty plumbing, for example, a leaking tap or tank.
Small portions of water fall into the sewer, cool quickly and freeze. Even the correct laying of sewer pipes and the presence of a layer of insulation do not always prevent the freezing of drains. Defrosting a frozen sewer is troublesome, in addition, this phenomenon can lead to damage to pipes, some of which will have to be replaced.

Freezing of the sewer pipe can occur gradually, layer by layer, and a little leaking plumbing only increases the risk of this unpleasant phenomenon
Therefore, it is recommended to lay the sewer below the level of soil freezing with mandatory insulation of communications. To dig a rather deep trench in the southern regions and the middle lane is usually not a problem, then in the north everything is a bit more complicated. In this situation, the use of a special heating or hot cable is more than appropriate.
When using this type of system, the volume of excavation is noticeably reduced, since the depth of the trench can be reduced to an acceptable level without worrying about freezing the soil.
How does the heating cable work?
A heating or hot cable is a heating system for pipes laid in the soil. The electrical cable in the insulating sheath is fixed to the pipe and connected to the power supply. The pipe heats up, as a result, the wastewater acquires a stably high temperature, which reliably protects them from freezing.
Distinguish a cable for external heating of a pipe or internal. The first is laid outside the structure, and the second inside. It is believed that outdoor installation is easier than internal, so it is more in demand. In addition to the external cable, a heating film is also used.

Heating with a film for sewer systems is not often used. The material has to wrap the entire pipe, which complicates the installation, but provides uniform heating
The structure is completely wrapped with this material, then it is fixed. The film gives a more uniform heating of the pipe than the cable, it has less power, which allows to slightly reduce operating costs.
To heat the pipes, you can use a cable of three types:
- self-regulating;
- resistive;
- zonal.
A self-regulating cable is considered an extremely convenient option, since it can automatically change the heating temperature depending on climatic conditions. Cable resistance decreases if the soil heats up more and increases with decreasing temperature.

Self-regulating cable is most in demand in modern conditions, since it is easy to lay, it is more reliable and does not require additional elements for installation
Such a change in operating mode reduces the overall power of the system, i.e. allows you to save electricity. Moreover, the change in resistance may be different in individual sections of the pipeline. The result is a higher quality of heating, the self-regulating cable itself will last longer, and there is no need to install thermostats.
The resistive cable does not have such capabilities, but differs in comparison with self-regulating systems at a more moderate price. When installing this type of cable, you will need to install a set of temperature sensors and temperature controllers to ensure that the system changes when the weather changes.

Resistive cable costs less than self-regulating analogs. If this option is selected, carefully calculate the appropriate specific power to prevent overheating
If this requirement is neglected, the risk of overheating of the cable and its breakage increases. The zone cable also does not have the ability to regulate resistance, but this system does not generate heating along its entire length, but only in separate areas. Such a cable can be cut into separate fragments, which is convenient when installing pipelines of complex configuration.
It is also widely used in the installation of metal sewers or for heating tanks. It is worth noting that heating structures buried in the ground is not the only area of use for heating cable. It is also used to heat pipes laid on the surface or in rooms that are not heated.
Sometimes the cable is used only for individual sections of the pipeline, for example, parts that come to the surface. Systems that are mounted inside the pipe are used relatively rarely. Most often they are used if the pipeline has already been laid in the ground, and the installation of an external cable would require voluminous earthwork.
So installing an internal cable will be much cheaper. But such cables are usually recommended to be used only inside pipes of small diameter, since their power is small.
It varies between 9-13 W / m, which is usually not enough for large sewer pipes. The length of such a cable, for obvious reasons, should be equal to the length of the pipe. The internal heating cable is made only of a self-regulating type.
How to choose the right cable?
When choosing the right hot cable, you need to determine not only its type, but also choose its power correctly.
In this case, it is necessary to take into account such parameters as:
- design purpose (for sewerage and water supply, calculations are performed differently);
- the material from which the sewage system is made;
- diameter of the pipeline;
- features of the site that is supposed to be heated;
- characteristic of the used insulating material.
Based on this information, heat losses are calculated for each meter of the structure, the type of cable, its power are selected, and then the appropriate length of the set is determined. Calculations can be performed using a special formula, according to calculation tables, or using an online calculator.
The calculation formula looks like this:

Qtr - pipe heat loss (W); - thermal conductivity coefficient of a heater; Ltr is the length of the heated pipe (m); tvn - temperature of the contents of the pipe (C), tnar - minimum ambient temperature (C); D is the outer diameter of the communications, taking into account the insulation (m); d is the outer diameter of the communications (m); 1.3 - safety factor
When heat losses are calculated, the length of the system should be calculated. For this, the obtained value must be divided by the specific power of the cable of the heating device. The result should be increased, given the heating of additional elements. The power of the cable for sewage starts from 17 W / m and can exceed 30 W / m.
If we are talking about sewer pipelines made of polyethylene and PVC, then 17 W / m is the maximum power. If you use a more efficient cable, then there is a high probability of overheating and damage to the pipe. Information about the characteristics of the product can be found in its technical passport.
Using the table to choose the right option is a little easier. To do this, you first need to find out the diameter of the pipe and the thickness of the insulation, as well as the estimated difference between the temperature of the air and the contents of the pipeline. The latter indicator can be found using reference data depending on the region.
At the intersection of the corresponding row and column, you can find the value of heat loss per meter pipe. Then calculate the total cable length. To do this, the specific heat loss obtained from the table must be multiplied by the length of the pipeline and by a factor of 1.3.

The table allows you to find the specific heat loss of a pipe of a specific diameter, taking into account the thickness of the heat-insulating material and the operating conditions of the pipeline (+)
The result should be divided by the specific power of the cable. Then you need to take into account the influence of additional elements, if any. On specialized sites you can find convenient online calculators. In the appropriate fields you need to enter the necessary data, for example, pipe diameter, insulation thickness, ambient and working fluid temperature, region, etc.
Such programs usually offer the user additional options, for example, help to calculate the required diameter of the sewer, the size of the insulation layer, type of insulation, etc.
Optionally, you can choose the type of installation, find out the appropriate step when installing the heating cable with a spiral, get a list and the number of components that will be needed to install the system.
When choosing a self-regulating cable, it is important to correctly take into account the diameter of the structure on which it will be installed. For example, for pipes with a diameter of 110 mm, it is recommended to take the brand Lavita GWS30-2 or a similar version from another manufacturer. For a 50 mm pipe, Lavita GWS24-2 cable is suitable, for structures with a diameter of 32 mm, Lavita GWS16-2, etc.
Complex calculations will not be needed for sewerage, which is not often used, for example, in a summer cottage or in the house used, only occasionally. In such a situation, they just take a cable with a power of 17 W / m with a length corresponding to the size of the pipe. A cable of this power can be used both outside and inside the pipe, and it is not necessary to install a gland.

When choosing a suitable heating cable option, its performance should be correlated with the calculated data on the probable heat loss of the sewer pipe
To lay the heating cable inside the pipe, choose a cable with special protection against aggressive influences, for example, DVU-13. In some cases, for installation inside use the brand Lavita RGS 30-2CR. This is not quite the right but acceptable solution.
Such a cable is intended for heating the roof or storm sewage, therefore it is not equipped with protection against corrosive substances. It can be considered only as a temporary option, because with prolonged use under inappropriate conditions, the Lavita RGS 30-2CR cable will inevitably break.
Rules for installing cable on pipes
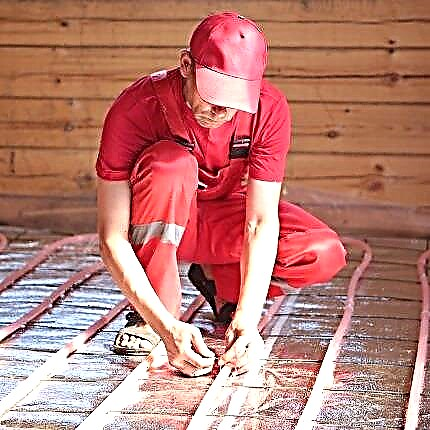
Laying a heating cable is a relatively simple process. It is simply fixed on the surface of the pipe, usually along, in one strip. Individual projects include spiral mounting. In this case, it is necessary to accurately maintain the calculated step between the turns of the spiral so that the pipe warms up evenly.

After the heating cable is fixed to the sewer pipe, it is recommended to additionally lay a layer of thermal insulation in order to improve the quality of heating
The intersection of individual sections of the heating cable is unacceptable. The cable, depending on the type, is secured with heat-resistant adhesive tape or mounting ties. The step between the attachment points must be at least 200 mm. To fix the cable in the mineral sheath, metal fasteners are used: tie straps or a special bandage.
But most often I still use heat-resistant tape. Fasteners should not only tolerate high temperatures, but also be resistant to the influence of natural factors and chemicals. Sometimes aluminum tape is used as a fastener. But in places of fastening, the thermal power of the cable will increase.
This is not always useful, it can lead to overheating of communications. It is not recommended to use metal fasteners when installing a heating cable enclosed in a polymer insulating sheath. But in some cases, aluminum tape can even improve the situation.

The heating cable on the plastic sewer pipe can be fixed with aluminum tape to increase the heating efficiency and make it more uniform
When laying on a polymer pipe, metallized adhesive tape is placed both under the cable and above it. This slightly increases the thermal power, and also contributes to uniform heating of the pipeline. Inside the sewer, heating cable is used extremely rarely.
Usually this is used to heat small sections of the system that are not in the ground, for example, sewage pumps that stimulate the movement of effluents if natural movement is difficult or impossible.

For mounting the internal cable, you may need a clamping and sealing sleeve, a coupling, a set of washers, as well as other elements (+)
To install the internal cable into the pipe, the installation of which is completed, you will first need to insert a tee into the system. This will make a hole for introducing the cable into the pipeline.
In addition, a special nipple coupling may be required. Such a solution may slightly worsen the characteristics of the sewer system, for example, at the installation site of the tee, the pipe clearance will slightly decrease.
This increases the likelihood of garbage accumulation and clogging. Difficulties with the internal cable are inevitable if the pipeline has several turns, bends, etc. It is not easy to carry out internal work on the installation of a hot cable, as well as in sewer systems of considerable length.
Of course, you should not connect the system to power until the installation is complete. Before closing the cable with insulation, carefully check all connection points. If you use temperature sensors, it will be easier to determine the time of activation and shutdown of the system.
Automate the process using relays. If the power of the cable laid in one line is not enough, you can perform a spiral installation or lay two parallel lines. The main thing is that certain sections do not intersect, and there is no overheating. To make the heating of the structure more uniform, sometimes the pipe is first wrapped with foil, then a cable is placed on top.

These examples allow you to get an idea of how to properly connect the supply and heating cable, as well as the procedure for its isolation (+)
Temperature sensors are installed after the insulation is supplied. From above it is recommended to apply a marking that reflects the position of the heating elements. To connect the heating cable to the mains, you need a piece of heat-shrinkable pipe. Then about 50 mm of insulation and 10 mm of braid are removed from the edge of the cable.
The separated and stripped ends are protected by pieces of heat-shrink tubing of a suitable diameter and heated with a hairdryer.Now you need to strip about 6 mm of wire, coil them with a spiral and clamp in a metal tube. Similar manipulations will have to be done with the power cable.
About 80 mm must be cleaned of insulation and sheath and divided into separate wires. The resulting ends are cut to 35 mm, but one wire should be left uncut for grounding. 6 mm wires are also stripped here.
Now the ends of the cables of the heating elements and power are connected in a heat shrink tube equipped with a metal sleeve. It is heated and clamped, the contact point is wrapped with thermal tape, and then closed with another protection tube.
The following article will familiarize you with the features of choosing directly pipes for an autonomous sewer device, the contents of which we recommend that you familiarize yourself with.
An example of a heated sewerage device
Consider an example of constructing a drainage system for a private household. According to the project, several branches are connected to the general sewer line. All of them are laid above the horizon of seasonal freezing of soils, therefore they are equipped with a heating cable.
In order for the operation of the heating electric system to be effective and aimed directly at maintaining the positive temperature of the sewer pipe, communications are laid in an insulated trench:
Image Gallery
Photo from
Step 1: Design a pipe trench
Step 2: Purchase Extruded Expanded Polystyrene
Step 3: assembling the system for fitting
Step 4: Fixing the stove insulation
Step 5: Check the slope of the sewer pipe
Step 6: Using Studs and Clamps
Step 7: Connect the sewer lines to the trunk
Step 8: Checking the Leakage of the Assembled System
Having ascertained the tightness of the assembled sewer pipeline or eliminating the leakage, if any, begin to lay the heating cable.

The heating cable in the example is laid close to the bottom of the tray, but without touching it. Fastens to the pipe in the form of a large loop starting from the riser located in the house and returning back
Having decided on the optimal position of the heating cable, proceed to its fastening:
Image Gallery
Photo from
According to the calculated length, a resistive cable in a metal braid is purchased. Its outer layer is made of polymer that protects the conductors from moisture
The required number of pieces for the equipment of sewer pipes with a heating "loop" is cut. The edges of the segments are cleaned and prepared for connection
The heating cable is fixed to the sewer pipe with metallized tape every 30 cm and still further near the pipe joints
Sewer riser and pipes located in the unheated basement of the house are also insulated and supplied with a heating cable
To control the operation of the heating cable system, a temperature controller is installed. You can control it manually, turning the cable on and off at your own discretion, or choose automatic mode
To operate the heating cable in automatic mode, the user selects the temperature limit. If the pipe cools down and its temperature becomes lower, the system starts up automatically. When the upper limit is reached, it turns off
If the temperature of the sewer system is higher than the lower temperature limit set by the owners, the heating cable consumes very little energy
When the heating cable is activated, energy consumption naturally increases. But in general, the system is not too "gluttonous"
Step 9: Purchase Resistive Cable
Step 10: Preparing the Cable for Connection
Step 11: securing the cable with metallic tape
Step 12: Install the cable on the riser
Step 13: Installing the thermostat for the heating cable
Setting the required temperature
Minimum current consumption during shutdown
Increase in consumption during the period of activation
In order for the system for heating communications to be able to function in automatic mode, a temperature sensor is connected to it:
Image Gallery
Photo from
A sensor designed to fix the real temperature is laid under the pipe between the two lines of the heating loop
The length of the standard cable connected to the sensor by the manufacturer is not enough for laying along the entire sewer line. It is being increased by an additional cable
The cable extending the temperature sensor cable is connected in a standard way - twisting
Since condensation and the leakage of a certain amount of ground water into the insulated trays are not excluded, all electrical connections are insulated with a heat shrink tube
The heating cable is connected to the control element - thermostat by the wire Vvg Ng. Wire cross section for connecting 2 × 2.5 mm, crimping is performed with copper sleeves
After connecting, the system is checked for operability. If everything is in order, sewer pipes with a heating cable are wrapped with 1 cm thick foil
Heat insulation equip the entire underground sewer line and the part passing in unheated rooms. In the area of functional units, insulation is reinforced
Trays with arranged, connected and insulated sewer and heating cable system are closed with concrete slabs, which can play the role of pedestrian walkways
Step 14: temperature sensor for heating cable
Step 15: Extend the wire to connect the sensor
Step 16: Extend the temperature sensor cable
Step 17: Insulation of the cable connection area
Step 18: Connecting the heating cable to the thermostat
Step 19: Wrapping the Pipe with Foil
Step 20: Additional Isolation of Nodes
Step 21: arranging the trays with concrete slabs
Detailed recommendations for installing a hot cable on a pipe with a diameter of 110 mm can be found here:
This video presents an option for laying sewage using an internal cable:
Here is an overview of the features of the functioning and installation of a self-regulating cable:
A hot cable solves the problem of freezing sewer pipes in winter much more effectively than other means. Electricity consumption is minimal. If the installation is done correctly, the cable will work for many years without any breakdowns.
Do you want to share the experience gained during the installation of a heating cable on your own sewer pipes in a suburban area? There is information that may be useful to site visitors interested in the question? Please write comments in the block below, ask questions and leave a photo on the topic.